照会ワークフロー
ワークフロー・マネージャーでは、照会ワークフローを使用して、組織のニーズに最適な照会ルーティングのルールを定義できます。照会ワークフロー・ビルダーのカスタム照会フォームと条件ノードを使用すれば、あるユーザーから別のユーザーへの照会の流れを正確に制御できます。とある問い合わせをユーザーの直属のマネージャーに、そして、別のタイプの問い合わせを管理者に直接送信したい場合。フォーム・ビルダーと条件ノードを使用すると、この操作を実行できます。
照会ワークフローを使用する方法の詳細については、ICM照会管理の概要のコースを受講してください。
照会ワークフローの作成
ワークフロー・マネージャーを介して照会をルーティングするルールを作成するには、まず照会ワークフローを作成する必要があります。ワークフローの問い合わせの下書きは、必要な数だけ作成することができます。複数の実行中の照会ワークフローを持つことができますが、複数の照会ワークフローを同じレポートに割り当てることはできません。照会ワークフローを停止すると、そのワークフローはアーカイブされ新しい照会を行うことはできませんが、未解決の照会は、閉じられるまで引き続き処理できます。
[ワークフロー]モジュールで、[作成]をクリックし、を選択します。
照会ワークフローの名前を入力し、をクリックします。
ヒント
後で名前を変更するには、コンテキストメニュー(...)をクリックしてから、
 をクリックします。
照会ワークフローを作成したら、名前をクリックして照会ワークフローの編集を開始できます。
照会フォームの設定
照会を実行する前に、[セールスポータル] ユーザーが新しい照会を作成するときに使用する照会フォームを設定する必要があります。すべての照会フォームには、タイトルとメッセージが必要です。フォームのその他の要素はすべてカスタマイズできます。
ヒント
デフォルトのフォームを使用する場合でも、照会ワークフローを実行する前にフォームを保存する必要があります。
[照会フォーム]タブをクリックします。
[照会フォーム]タブをクリックします。
フォームの各オブジェクトを、ニーズに合わせて設定します。
[en] To add new fields to the form, click the icon
 and then select the type of field you want to add.
[en] Numeric field
[en] Text field
[en] Static pick list
[en] Source-driven pick list
[en] Source-driven pick lists require you to select a data source, and configure the ID and Display columns. You can also optionally add filters.
フォームの各オブジェクトを、ニーズに合わせて設定します。
注記
すべてのフォームには、フィールドラベル、フィールドID、テキスト例が必要です。これらのフィールドのラベルはカスタマイズできますが、常に必須であり、パラメータは件名とメッセージのままです。
フォームの各オブジェクトを、ニーズに合わせて設定します。
テキストフィールドを追加する場合は、フィールドラベル、フィールドID、テキスト例を入力します。また、ヘルプテキストとテンプレートのオプションを追加することもできます。
テンプレートオプションを追加するには、テキストを入力し、追加アイコン
 をクリックします。
テンプレートオプションを削除するには、マイナスアイコン
 をクリックします。
[en] To delete a template option, click on the subtract icon
.[en] Drag and drop the options you have added to reorder them.
フォーム内のオブジェクトとテンプレートプションを並べ替えるには、移動したいオブジェクトの上にカーソルを置いてから、オブジェクトを新しい場所にドラッグ&ドロップします。
をクリックします。
動的フォームフィールドの構成
動的フォームフィールドを使用すると、問い合わせフォームは、問い合わせ送信者が入力した値に基づいてフォームフィールドをレンダリングできます。受取人が選択した情報に応答する問い合わせフォームを作成できるようにする事で、よりガイド付きで関連性の高いフォームエクスペリエンスを提供します。動的フォームフィールドを設定する方法は次のとおりです。
各フィールドのビューオン
 アイコンとビューオフ
 アイコンは、現在表示されているフォームフィールドと表示されていないフォームフィールドを示します。
編集するフォームフィールドをクリックします。
[コンテンツ]タブから、フィールドのさまざまなコンポーネントを編集できます。例として、オブジェクトフィールドを必須にすることができます。
フィールドを削除するには、[フィールドの削除]をクリックします。
[デフォルトの可視性]状態の[可視性]タブから、フィールドの表示または非表示を選択したり、ユーザーによるフィールドの編集を許可または禁止したりできます。
可視性フィルターを使用すると、フィルターを設定して、フィールドの可視性状態がいつ変化するかを判断できます。
[フィルターの追加]をクリックします。
フィールド結果を適用する方法と、次の条件が満たされた場合のロジックを選択します。
フィルター名を入力します。
説明を入力します。
[完了]をクリックします。
お問い合わせフォームの保存をクリックします。
フォームのプレビューを表示するには、[プレビュー]をクリックします。
スイムレーンの追加
照会のルーティング・ルールを作成する前に、まずワークフローの概要にスイムレーンを追加し、そのスイムレーンにどのユーザーがいるかを選択する必要があります。
デフォルトで、[照会提出者]スイムレーンが常に存在します。これは、新しい照会を作成したユーザーです。
[en] Payee swimlanes - include payee users who can submit, review, and action on inquiries in Sales Portal.
[en] Admin swimlanes - include admin users who can access the Admin Client and manage inquiries from the Inquiry Management module.
照会概要にスイムレーンを追加したら、任意のスイムレーンにノードを追加できます。
照会概要にスイムレーンを追加したら、任意のスイムレーンにノードを追加できます。
[en] Defining the inquiry submitters
[en] Edit the Inquiry Submitter swimlane to define which users are able to submit inquiries.
[en] From the Workflows module, click an inquiry workflow to open it.
[en] From the Workflow routing tab, hover over the Inquiry Submitter swimlane and click the Edit icon
.[en] (Optional) From the Swimlane wizard, change the default Inquiry Submitter swimlane name to something more meaningful:
[en] Click the Edit icon
next to the Inquiry Submitter swimlane name.[en] Enter a new name for the swimlane, such as Sales Reps.
[en] Enter a description that summarizes the purpose of the swimlane.
[en] Click Save.
[en] Under the Type tab, choose one of the following options:
[en] Explicitly select payees - allows the administrator to manually choose which payees to include in the swimlane.
[en] Select payees by restrictions - includes payees in the swimlane based on defined restrictions.
注記
[en] This is the recommended option, as it ensures that payees are updated automatically when roles change.
[en] Click Next.
[en] Depending on your Type selection, do the following:
[en] Type
[en] Steps
[en] Explicitly select payees
[en] Select the checkboxes next to the payees you want to include in the swimlane
[en] Select payees by restrictions
[en] From the Data sources tab, add a data source:
[en] Expand the source type you want to add (for example, Tables or Calculations).
[en] Find your data source in the list or search for it, and then drag it into the Add data sources pane.
注記
[en] The Payee table is included as a data source by default. This table contains payee IDs. Access to Sales Portal is based on this table.
[en] Click Next.
[en] From the Restrictions tab, add restrictions to define which payees to include in the swimlane:
[en] Hover over AND and click Restriction.
[en] Expand your data source and drag a column into the cell.
[en] Select an operator.
[en] Select or type a value into the second cell. For example, you may create a restriction rule like Payee.TitleID = Sales Rep. This includes payees with the title Sales Rep in the swimlane.
注記
[en] You can set complex restrictions by creating AND or OR groups. For more information about restrictions, read 制限:.
[en] Click Create.
[en] Adding payee swimlanes
[en] Payee swimlanes include users who can manage inquiries in Sales Portal.
[en] From the Workflows module, click an inquiry workflow to open it.
[en] From the Workflows routing tab, click .
[en] Enter a name and description for the swimlane and click Save.
[en] Under the Types tab, choose Select payees by restrictions to create a payee swimlane.
[en] Click Next.
[en] Under the Data sources tab, choose a data source that contains the payee IDs for the users you want to include in the swimlane. The Payee table is added by default.
ヒント
[en] To define restrictions based on the payee who submitted the inquiry, search for and add the Form Initiator table as a data source. For example, if you want the inquiry to be routed to a payee's manager, you can use the Form Initiator table to get the ID of the payee who submitted the inquiry, and then you can use a RollupManager field (or something similar) in your Payee or other table to identify their manager.
[en] Click Next.
[en] From the Restrictions tab, add restrictions to define which payees to include in the swimlane:
[en] Hover over AND and click Restriction.
[en] Expand your data source and drag a column into the cell.
[en] Select an operator.
[en] Select or type a value into the second cell. For example, you may create a restriction rule like Payee.TitleID = Sales Manager. This includes payees with the title Sales Manager in the swimlane.
注記
[en] You can set complex restrictions by creating AND or OR groups. For more information about restrictions, read 制限:.
[en] Click .
[en] Adding admin swimlanes
[en] Admin swimlanes include users who can access the Admin Client and manage inquiries in the Inquiry Management module.
[en] From the Workflows module, click an inquiry workflow to open it.
[en] From the Workflows routing tab, click .
[en] Enter a name and description for the swimlane and click Save.
[en] Under the Types tab, choose Select ICM admin users to create an admin swimlane.
[en] Click Next.
[en] Under the Admins tab, select the checkbox for each admin user you want to include in the swimlane.
[en] Click .
ワークフロー開始後の管理者の追加
ワークフローがアクティブになっても、管理者を管理者スイムレーンに追加できます。
注記
[en] An admin swimlane is where you route to users who can access the IncentivesIncentives Admin Client and manage inquiries from the Inquiry Management module.
ワークフローモジュールで、変更するワークフローを開きます。
管理者スイムレーンにカーソルを合わせます。スイムレーンを編集するには、編集アイコン
を選択します。注記
[en] There is no visual difference between your payee swimlanes and admin swimlanes. When setting up your swimlanes, it's best practice to use descriptive names to identify each swimlane's purpose.
エディタが開きます。エディタで[管理者]を選択します。
チェックボックスを使用して、スイムレーンの管理者を選択または選択解除します。
作成を選択して変更を保存し、エディタを閉じます。
電子メール内で問い合わせに対応する
Fabricを使用 - 電子メール内から問い合わせに対応することができます。
照会を選択します。
管理者の電子メールに接続されているスイムレーンにカーソルを合わせます。
[編集]
をクリックします。[管理者] タブをクリックします。
電子メールの送信先となる電子メールアドレスを選択します。
[保存] をクリックします。
スイムレーンで、アクションを作成するノードをクリックします。作成されたアクションが、電子メールに表示されるオプションになります。
[アクション通知] タブをクリックして、電子メール通知の見た目をカスタマイズします。
[保存] をクリックします。
照会が送信されると、電子メールが送信されます。
電子メール上で、実行するアクションを選択します。アクションは電子メール1件あたり1回のみ送信できます。
セールスポータルの [通知] に、実行されたアクションの概要が表示されます。
注記
電子メール内から照会に対するアクションを実行できるのは、プレゼンターアダプティブレポートのみです。
ノード
スイムレーンを作成したら、照会の概要にノードを追加できます。ノードは、照会がステージ間でどのように移動するかのルールを定義します。
必要なすべてのノードの作成が完了したら、[開始]ノードと[終了]ノードを含むすべてのノードを接続して、照会ルーティング・ルールを定義できます。
アクション・ノードの追加
アクション・ノードを使用すると、ユーザーが照会に対して実行できるアクションを定義できます。このアクションは、照会を別のスイムレーンにルーティングするために使用できます。また、アクション・ノードでは、問い合わせがそのスイムレーンに到達したときにどのステータスにすべきかを定義することもできます。たとえば、ユーザーが拒否または承認などのアクションを実行できるようにするアクション・ノードを設定できます。これにより、その照会を2つの異なるスイムレーンにルーティングできます。
[en] From the Workflows module, create a new inquiry workflow, or open an existing one.
注記
[en] You cannot edit a workflow that is currently running. Instead, create a duplicate of the active workflow and then make your modifications.
[en] Place your cursor over the column in the swimlane to which you want to add the action node, and click
, and then click + New Node.ノード・タイプとして「アクション・ノード」を選択します。
ノードの名前と説明を入力し、[保存]をクリックします。
をクリックして、パスを追加します。これらは、ユーザーが問い合わせが自分のスイムレーンに到達したときに実行できるアクションです。
編集アイコン
をクリックしてパスの名前を変更し、[Enter]を押して保存します。必要な数のアクション・パスを追加してから、をクリックします。
[有効期限]タブで、有効期限を設定するかどうかを選択します。定義された日付または時間が経過すると、ユーザーが[有効期限パス]として選択したアクションを選択したかのような照会が続行されます。
[ステータス]タブで、このアクション・ノードに到達したときに照会のステータスを選択します。
[en] Under the Action notification tab, select whether to send an email with action options to the node assignee.
をクリックします。
条件ノードの追加
条件ノードは、照会フォームにユーザーが入力した値に基づいて自動ルーティング・ルールを作成するために使用されます。たとえば、ユーザーが照会フォームで選択するカテゴリーに応じて、照会を別のスイムレーンにルーティングする条件ノードを設定できます。
[en] From the Workflows module, create a new inquiry workflow, or open an existing one.
注記
[en] You cannot edit a workflow that is currently running. Instead, create a duplicate of the active workflow and then make your modifications.
[en] Hover over the column in the swimlane to which you want to add the action node, and click
, and then click + New Node.ヒント
[en] You can add a conditional node as the first node in the inquiry process. This lets you route inquiries to different groups immediately after the user submits an inquiry.
[en] Select Conditional Node as the node type.
ノードの名前と説明を入力し、[保存]をクリックします。
をクリックして、パスを追加します。
編集アイコン
をクリックしてパスの名前を変更し、をクリックします。[en] Drag a parameter from the inquiry form's list to the right pane, use the formula operators to create a condition, and then click Save.
[en] Let's say you want to route inquiries that are over 90 days old to the Finance department. You would configure the conditional path as follows:
[en] Condition: "If the inquiry is over 90 days old, route to finance."
[en] Parameter and formula: Use the parameter from the inquiry form corresponding to the submission age, and set up your condition like this: paramDays >= 90.
[en] After creating the conditional node, create a new action node for the Finance department to review the inquiry. Read アクション・ノードの追加 to learn more.
必要な数の条件付きパスの追加を続行し、をクリックします。
自動調整ノードの追加
自動修正ノードにより、レポート内の金額変更の承認および更新プロセスを合理化できます。受け取り人がセールスポータルのレポートで金額について質問すると、数回クリックするだけで照会管理で新しい値が承認され、セールスポータルのユーザーに対してレポートが即座に更新されます。
照会ワークフローに自動修正ノードを追加するには:
注記
自動修正ノードを追加する前に、照会フォームが設定されていることを確認してください。照会フォームの設定については、上記を参照してください。自動修正ノードを設定する際に、照会フォームにトランザクションID、申請金額、調整理由などの情報を入力するよう設定すると便利です。
[en] Read 照会フォームの設定 to learn more.
[en] From the Workflows module, create a new inquiry workflow, or open an existing one.
注記
[en] You cannot edit a workflow that is currently running. Instead, create a duplicate of the active workflow and then make your modifications.
[en] Hover over the column and swimlane where you want to add the node, and then click + New Node.
ノードタイプとして[自動修正ノード]を選択します。
ノードの名前と説明を入力し、[保存]をクリックします。
ノードをマップするソーステーブルを選択します。
[en] This mapping is important for the automatic data adjustment based on requests initiated in Sales Portal.
照会フォームのフィールドをソーステーブルのキー列に一致させます。これにより、更新される記録が特定されます。更新するには、少なくとも1つのフォームフィールドをソース列に一致させます。
[en] This allows the table to be automatically adjusted based on the payee requests in the Sales Portal.
注記
[en] Match at least one form field to a source column for updates.
[保存]をクリックします。
[en] Connect the Auto Adjust node to other nodes, integrating it into the workflow process.
[en] Read Nodes to learn about creating different nodes in the workflow.
[en] From the Reports module, assign the inquiry workflow to the report.
[en] Read 照会ワークフローのレポートへの割り当て to learn more.
[en] From the Reports module, map your table to the inquiry form so that the fields auto-populate in the Sales Portal.
[en] Read 照会へのPresenter Adaptiveテーブルの行のコピーの有効化 to learn more.
[en] A payee can now quickly request changes to the report table after approval. The selected row information from Sales Portal is included in the inquiry form, which the Reports module automatically populates.
[en] The payee can submit a new inquiry form to request adjustments to a field. Their manager receives a notification regarding the submitted inquiry and can take action on it.
[en] Connecting nodes
[en] After you have added nodes to the workflow overview, you must connect them to define how the inquiry moves from one node to another. All nodes, as well as all action and conditional paths, must be connected to other nodes.
[en] From the Workflows module, create a new, or select an existing inquiry workflow.
[en] Select the node you want to connect.
[en] An arrow appears on the node that you can use to connect it.
[en] To connect the Start node to the first node of the process, click the Start node and drag the arrow to the node that you want to connect to.
[en] Or select the first node of the process and then click the Assign as start node icon
 from the floating toolbar to automatically connect that node to the Start node.
[en] Connect the rest of the nodes to the workflow process by dragging the arrows from one node to another.
[en] For each Action node with multiple action paths, complete these steps:
[en] Click the Action node and drag the arrow to one of the nodes that you want to connect to.
[en] Select the action path that you want to connect to the node, and click Save.
[en] For each Conditional node with multiple paths, complete these steps:
[en] Click the Conditional node and drag the arrow to one of the nodes that you want to connect to.
[en] Select the path that you want to connect to the node and click Save.
ワークフロー・プロセスの最後のノードを[終了]ノードに接続し、ワークフローを完了します。
または、プロセスの最後のノードを選択し、フローティング・ツールバーの アイコン
 をクリックして、そのノードを終了ノードに自動的に接続します。
照会ワークフローのアクティブ化
[en] Before linking inquiries on a report, it's important to run the inquiry workflow first, and then assign it to relevant Presenter Adaptive Reports.
[ワークフロー・ルーティング]タブで、 ボタン
 をクリックします。
[en] In the Workflow Routing tab, click the button
.
注記
[en] Once the workflow is running, you can't make any changes except adding new payees or admins.
照会ワークフローのレポートへの割り当て
ポータル・アクセスの各レポートで有効にする照会ワークフローを選択できます。照会ワークフローは、レポートに割り当てる前に実行する必要があります。
ポータル・アクセスで、タブに移動します。
[照会ワークフロー]列で、メニューから実行中の照会ワークフローを選択し、対応するレポートに割り当てます。
ヒント
モデル内のレポートのリストを表示するには、[プレゼンター・レポート]と[プレゼンター・アダプティブ]フォルダーを展開する必要があります。
[en] You can also assign an inquiry workflow to a Presenter Adaptive report while editing the report.
[en] From the Reports module, select or create a Presenter Adaptive report.
[en] Once the report is open in the editor, click on the Report options
 icon.
icon.[en] In the Report Options sidebar, locate the Inquiry workflow section.
[en] In the Assign a workflow to report dropdown, select the Inquiry workflow.
[en] Click Save to save the changes you've made to the report.
[en] Optionally, if your report is enabled in Sales Portal, click View in Assignments. This opens the Assignments tab in Portal Access, and the assigned Inquiry workflow is visible in the Inquiry workflow column.
[en] To allow web users to copy a row from a table in to an inquiry from a Presenter Adaptive report:
[en] From the Reports module, select or create a Presenter Adaptive report.
[en] Click an existing table object on the report canvas.
[en] To configure a report table, read: プレゼンター・アダプティブ・レポートへのフィルターの追加。.
[en] In the Data tab, under Web user options, select the Copy row to inquiry checkbox.
[en] Click Save.
ワークフロー開始後の受け取り人の追加
[en] You can include payees in the designated swimlanes even after initiating a workflow. For example, the form initiator has a restriction for all payees with the QA role and the workflow has started. When a new QA is added to the payee table, it will meet the requirements, so when Scheduler starts the task, it will add the new QA into the workflow.
[en] Here’s how to add payees after a workflow has started:
[en] From the Workflows module, start a workflow or select a running workflow.
ツールバーでワークフロー受け取り人を[追加]アイコン
 をクリックします。
[en] From the Data Sources tab, add any additional データ・ソース that are required to define the payee or payee group that makes up the first swimlane. Any table or calculation with a payee partition as a source can be used.
[en] From the Restrictions tab, define the 制限: for the payee or payees who make up the form initiator swimlane.
注記
[en] If you used restrictions to define payees, you can schedule the addition of workflow payees in the Scheduler module.
[en] If you are not defining payees by restriction, on the Payees tab, select or clear the selected column to add or remove payees from the form initiator swimlane.
[en] Click Save.
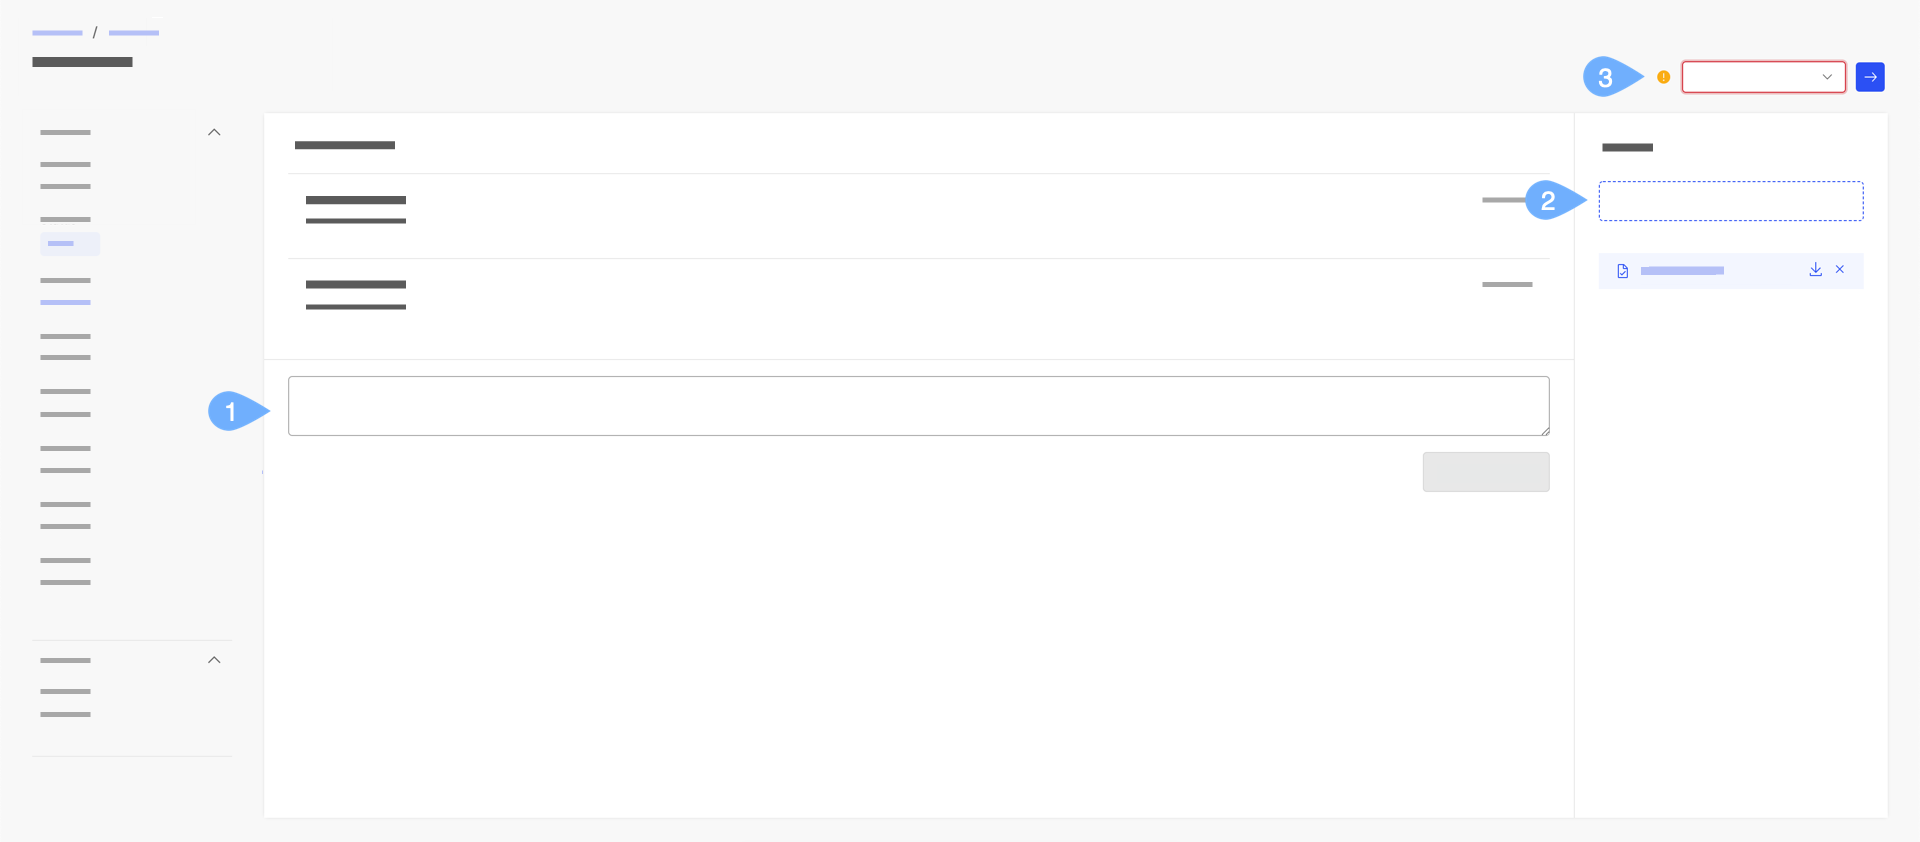
[セールスポータル]での問い合わせの作成
そのレポートに対して照会が有効になっている場合、[セールスポータル]ユーザーは照会を送信できます。
セールスポータルのレポートから、アイコン
 をクリックします。
すべての必須フィールドと、照会フォームの任意のフィールドに入力します。ユーザーは、必ず[件名]と[メッセージ]のフィールドに入力する必要があります。
問い合わせを裏付ける文書を添付してください。
ヒント
デフォルトでは、レポートのスクリーンショットが添付ファイルとして含まれています。これは、問い合わせを処理しているすべての人が、レポートが[セールスポータル]ユーザーに表示されるのを見るのに役立ちます。この添付ファイルは、レポート名のチェックボックスをオフにして削除できます。
をクリックします。
照会の送信後、ユーザーは[メッセージ・センター]にアクセスして照会を表示できます。照会がさまざまな段階で進行するにつれて、Webユーザーは、どの管理者がその照会を所有しているか、あるいは、その照会のステータスなどの情報を見ることができます。また、作成した照会が更新されると、ユーザーには電子メールとアプリ内の通知が送信されます。
[セールスポータル]の照会管理
セールスポータル[メッセージ・センター]では、ユーザーはサイドバーの[照会]タブから問い合わせを表示できます。
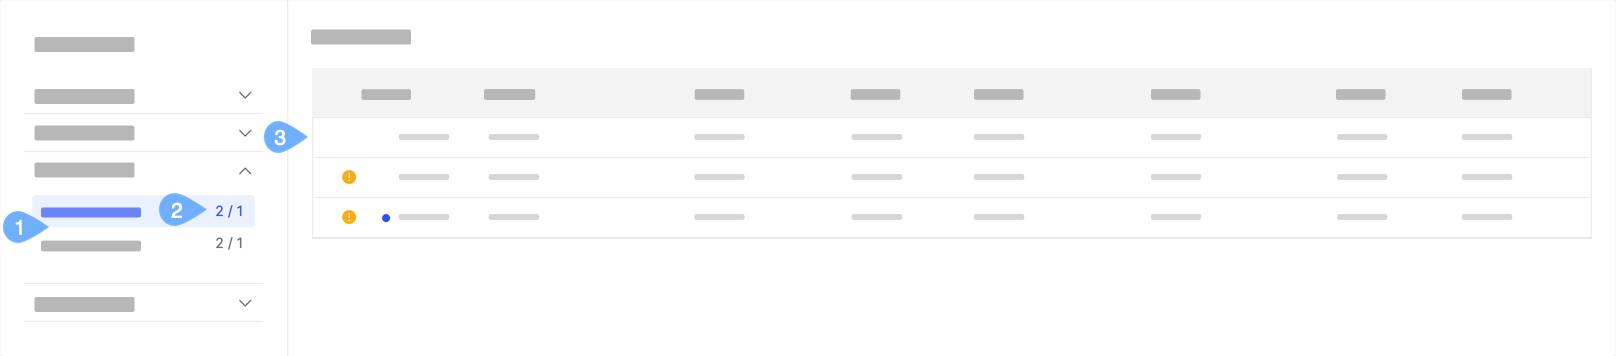
 は、新しい照会、または未読の更新のある照会を示します。
 は、この照会に対してアクションが必要であることを示します。
問い合わせには、[マイ照会]と[すべての照会]の2つのカテゴリーがあります。
[マイ照会]には、ユーザーが開いたすべての問い合わせが表示されます。
[すべての照会]には、ユーザーが表示、または操作できるすべての照会が表示されます。
各カテゴリーの横にある数字は、ユーザーからのアクションが必要な問い合わせの数と未読の更新のある問い合わせの数を示します。
照会の詳細を表示するには、ここをクリックしてください。
[en] The Inquiry management table shows new unread inquiries in bold. If you see a yellow dot icon next to an inquiry row, it indicates the admin needs to take action. To learn more, read: [en] Taking action on an inquiry. Click on an inquiry row to view its details.
コメントの追加。
添付ファイルを追加します。
照会に対してアクションを実行します。これには、クローズした照会の再開が含まれます。
照会にテーブル行をコピーして自動調整を行う
Varicent®では、Varicent ICMSales PortalのWebユーザーはプレゼンターアダプティブレポートのデータ行を照会フォームにコピーすることができます。行データは、照会フォームのマッピングされたフィールドに自動入力されます。Webユーザーは、照会フォームフィールドに必要な変更を行い、変更内容を送信して承認を求めることができます。
注記
この機能は、管理者によって有効化されている場合にのみ使用できます。
照会に行をコピーするには:
データグリッドで、照会にコピーする行のコピーアイコンをクリックします。
行のデータは、照会のマッピングされたフォームフィールドにコピーされます。
ヒント
照会にコピーできるのは1行分のデータのみです。
必要に応じてフォームフィールドの値を更新し、照会を送信して承認を依頼してください。
[en] Click Submit.
プロファイル設定
照会の送信通知を設定することで、個人設定を管理することができます。各トグルボタンを有効または無効にすると、照会内でアクションが取られたときに受信または受信しないメールを設定することができます。これにより、照会ライフサイクルへの関与をより適切に管理することが可能です。
受取人の場合:
ワークフローモジュールから、プロファイルアイコンをクリックして[プロファイル設定]を選択します。
左側のパネルで[通知]を選択します。
自分が送信した照会、自分に関連する照会、照会のフォーム値が変更された場合、誰かがコメントをした場合、アクションをした場合、照会が完了した場合のメール通知を有効または無効化します。
[en] Notifications for inquiries you're affiliated with.
[en] Notifications for inquiries you submitted.
[en] Notifications when form values change in the inquiry.
[en] Notifications when someone comments on the inquiry.
[en] Notifications when someone takes an action on the inquiry.
[en] Notifications when someone closes an inquiry.
管理者の場合:
ワークフローモジュールから、プロファイルアイコンをクリックして[プロファイル設定]を選択します。
左側のパネルで[通知]を選択します。
自分が担当する照会のメール通知を有効または無効にします。これは、自分が照会の所有者として割り当てられたときに関連する照会です。
自分が関連する照会のメール通知を有効または無効にします。これは、自分が変更を行った、またはアクションを実行した照会です。
[en] Turn on or off email notifications for Unassigned inquiries. These inquiries remain unassigned to any admin.